Skip to main content Skip to search Skip to navigation

How to calibrate your touch display

STEP 1:

Prepare your mega2560board, TFT shield, TFT display.

Use your data cable connect mega2560 to your computer.

STEP2:

Download Arduino IDE 

Download Library URTouch 

Download Library UTFT 

Unzip all the ZIP, install Arduino IDE in your computer

Open file folder: Arduino-nightly-libraries, put your unzip file: ’URTouch’ and ’UTFT’in libraries file folder.

STEP3:

Open arduino.exe in Arduino file folder

Click Tools-Board-Arduino Mega or Mega 2560

Click Tools-Port-COM4(Arduino Mega or Mega 2560)

And

Open file: libraries\URtouch\examples\Arduino\URTouch_Calibration\URTouch_Calibration.ino

STEP4:

find code line (#define TOUCH_ORIENTATION  PORTRAIT)

Check your display size

If your display <= 3.2inch, the code should be: #define TOUCH_ORIENTATION  PORTRAIT

If your display>3.2inch, the code must change to: #define TOUCH_ORIENTATION  LANDSCAPE

STEP5:

find code line (UTFT    myGLCD)

If your screen is 4.3inch, change code to ITDB43

If your screen is5.0inch, change code to ITDB50

If your screen is7.0inch, change code to CTE70

Save your code (Ctrl+S)

Click upload button

STEP6:

Return your Mega2560 display, you can see the calibration shows like below:
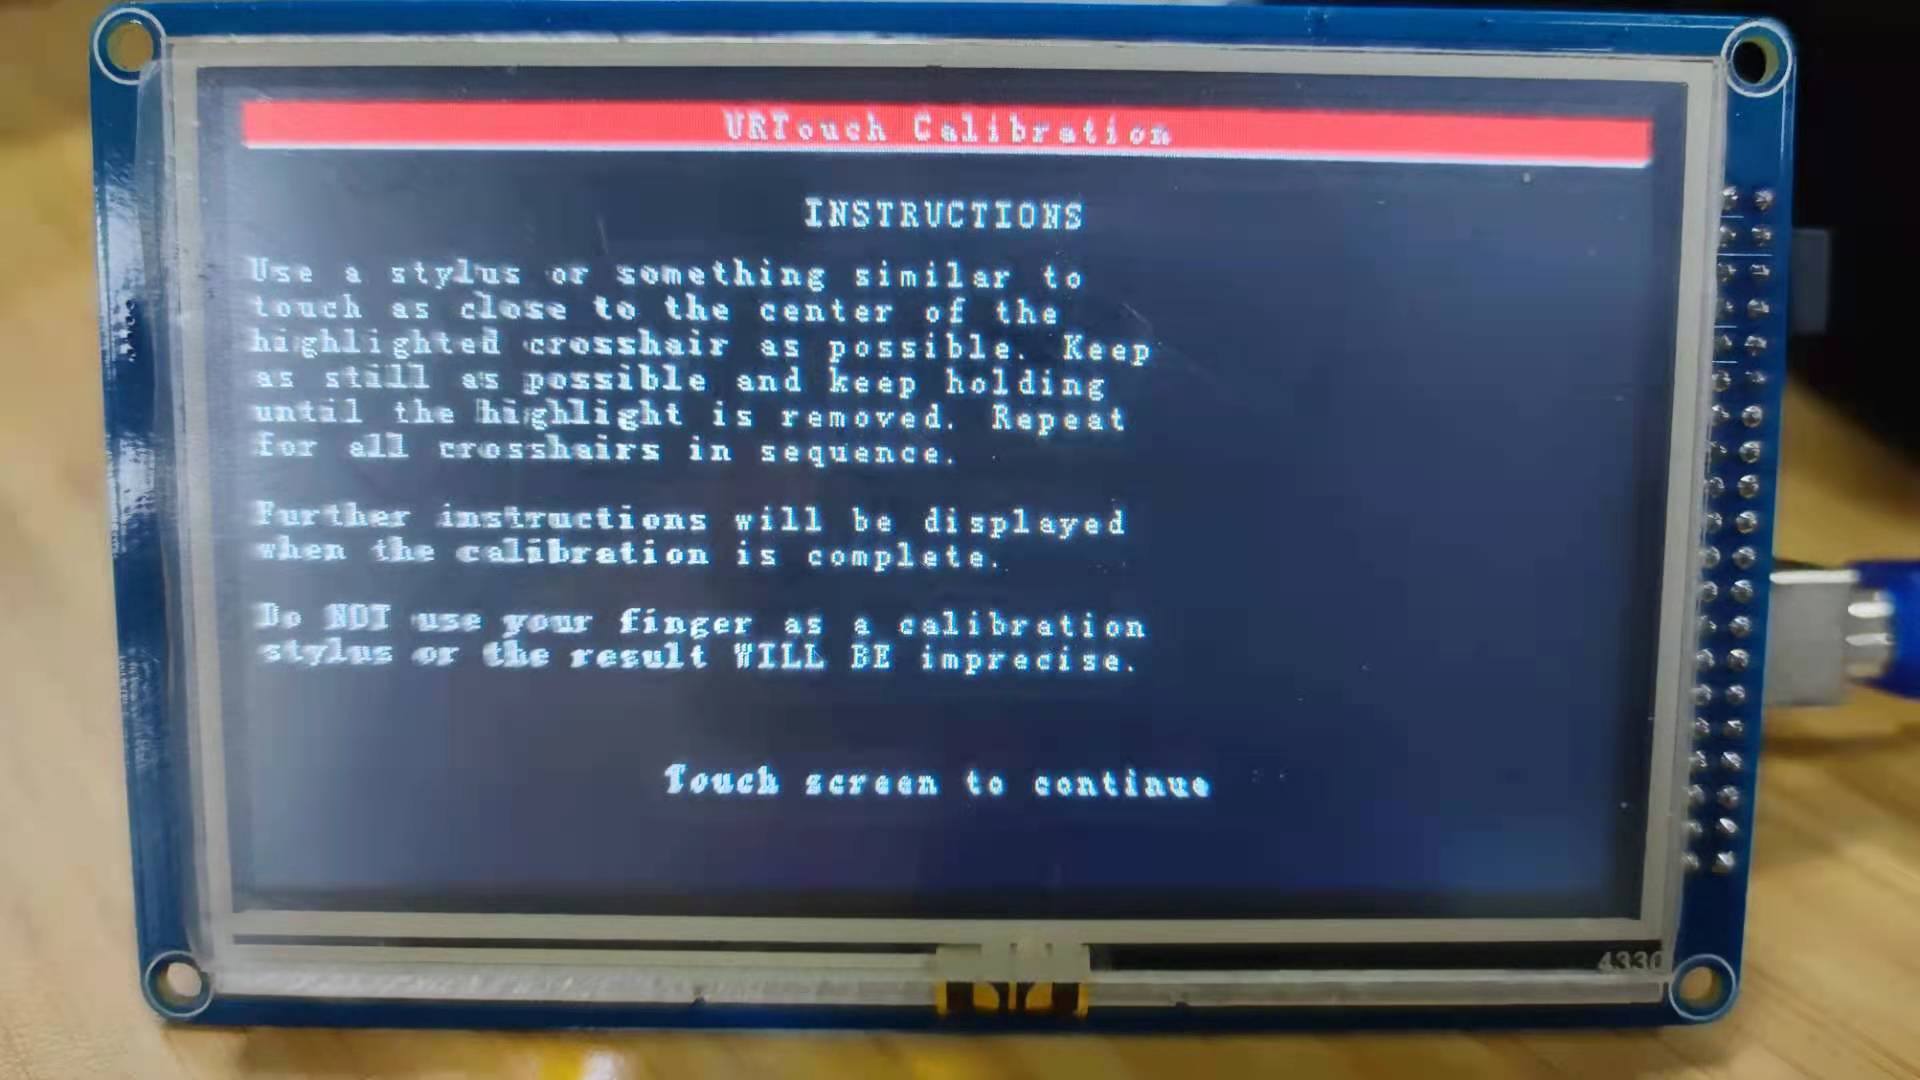
Click the touch screen,

Press the highlighted symbol +, follow the center information, hold and release

The result should be like this
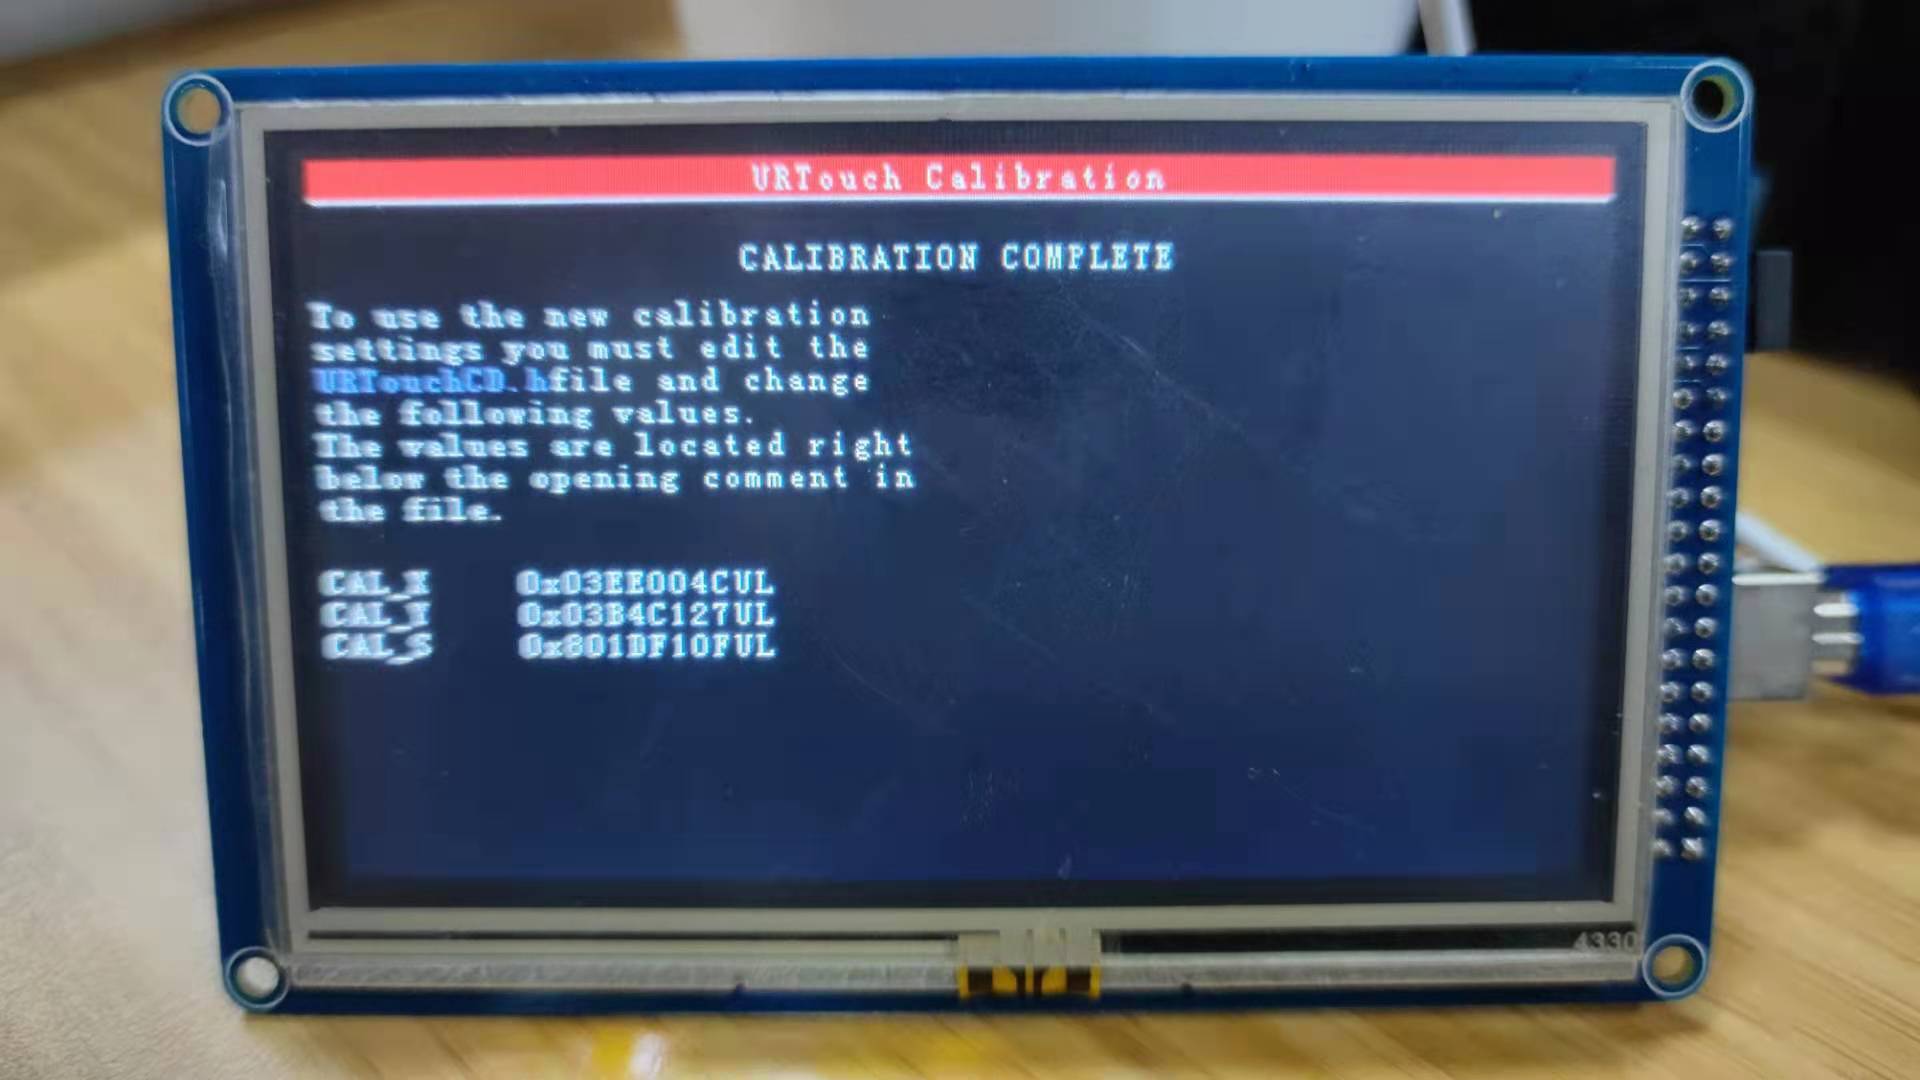
You need these three lines for the next steps.

STEP7:

Open file: libraries\URtouch\examples\Arduino\URTouch\URTouchCD.h as .txt file

Change these three lines to your calibration results

Save file (Ctrl+S), 

Congratulations, you can start your projects now.

Eckstein GmbH
2021-07-07 12:00:00 / other / Comments 0

Why does the official OpenArm power setup work in demos — but struggle under real load?Many OpenArm users encounter voltage drops, reduced torque, or unexpected shutdowns once multiple joints...
In this post we explain why our OpenARM-compatible mechanical kit uses a hybrid manufacturing approach: CNC-machined aluminum parts (anodized) where precision and functional interfaces matter, and
Dive into the world of voltage regulators with our expert guide. Discover the nuances between Buck, Boost, Step-Up, and Step-Down converters. Learn about their applications, key technical...
Neue Versandmethode ist schon da! Als Spezialdistributor für elektronische Komponente verfügt Eckstein seit jeher über ein eigenes Lager, um einen zeitnahen und effizienten Service zu
17.03.2022,
Eckstein GmbH
0 Comment for the news posting Eckstein - Warenpost
We got some Arduino UNO Limited Edition board, there will be shipping to our storehouse in 1 week. Today we receive a sample, so I’d like to open box, and show you guys. Open
Today, I’ll show you how to run windows11 on raspberry First of all, you need download some tools Windows on raspberry imager(https://dl.orangedox.com/WoR-Release-2.2.2?dl=1) Next
20.07.2021,
Eckstein GmbH
0 Comment for the news posting Install windows11 on raspberry pi 4
Today, I'll show you how to install raspberry pi OS, and show you the most populaire raspberry OS HOW TO INSTALL RASPBERRY OS First of all, we need a tool to install raspberry OS, I I recommend
STEP 1 Open up your Arduino IDE STEP 2 Connecting the Arduino to the computer USB STEP 3 Tools--board,choose your Arduino Tools--Port,choose COM STEP 4
I am already a customer.
Login for registered customers
Log in

Add product directly to the cart:

You can search by item no. or EAN/GTIN to quickly add the product to the cart.


Color Adjustment
Font Sizing